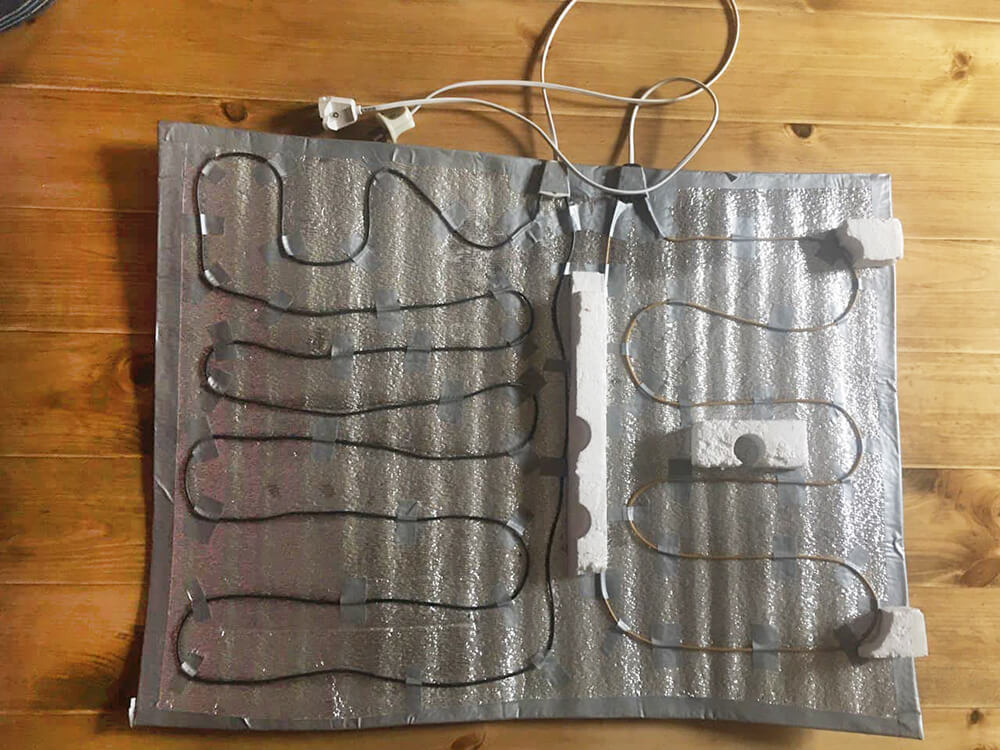
A mat made from heating cable with minimal components. It was assembled in a hurry, yet it’s a very successful version of a DIY seedling heater, and I recommend it specifically. It has worked well for one season, and I will use it again.
The main advantages of this modification are:
- The size and dimensions can be made to any specifications, and you can increase or decrease the heating area at any moment, including by changing the number of separately switched heating circuits. This is not possible with a “warm” electric blanket, and ready-made heating mats do not provide zoning options.
- The cost of my mat with dimensions of 80x60 cm is about $4 (100 UAH plus the profile for lighting, if needed).
- It is convenient even without a thermostat.
- The heating mat effectively prevents fungal diseases in seedlings.
My mat, 80x60 cm
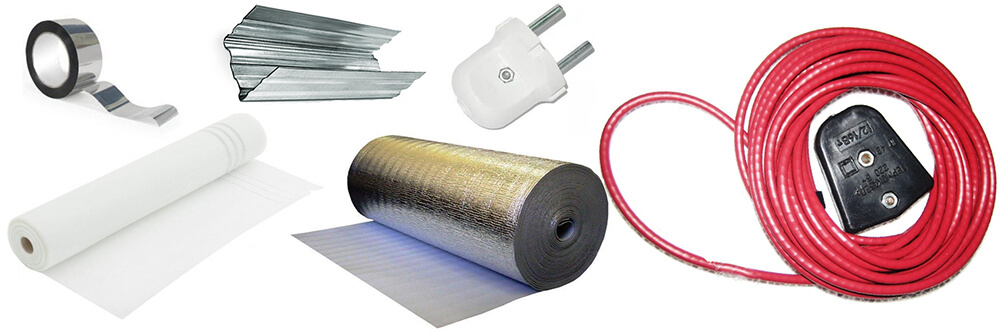
In the collage, I’ve gathered everything needed for such a heating pad:
- Plastering fiberglass mesh;
- Metalized tape;
- Foil-insulation (foam, foil-covered polyethylene);
- Low-temperature heating cable;
- Plug socket;
- Profile for drywall (for creating lighting, optional);
- A cord with a small cross-section (I forgot to include it in the picture).
The base is made from plastering fiberglass mesh. It’s convenient because it’s very strong, elastic, and doesn’t bend when rolled up. However, it could also be done without it.
The tape I used is reinforced, but metal tape would be better if available. Foil insulation is an excellent thermal insulator and reflector and a durable flexible base for the mat. It can be purchased in any hardware store.
The heating cable I’m using is a carbon wire of 2 and 4 meters at 20 W and 30 W, intended for incubators, chicken coops, and heating vegetable storage in unheated warehouses. Here, such cables are used to insulate dog pens and houses and are long-lasting. In general, any “heated floor” system can be used. You can adapt a film heating system or mats on rolls—differences will be in pricing, convenience, and mounting universality.
When choosing a cable, pay attention to the recommended minimum length of the piece, in my case, ready-made pieces come with connectors.
The plug and cable are needed for power connection, and the cable length will depend on the distance from the outlet. I use a power strip with several sockets to connect the lamps and the mat. If necessary, I can unplug any element.
I built a cube frame from metal profiles for additional lighting of the seedlings. My version is the simplest one, without adjustable light levels— I manually raise or lower the lamps using the power cord as the seedlings grow. For soft light reflection and greater energy savings, I cover the cube with white non-woven material, sometimes with white calico. I’m not very fond of the idea of enclosing everything in reflective foil insulation if you don’t have a thermostat.
You can make the “heating wiring” in a multitude of ways, just make sure to maintain the recommended distances between the cable turns. If you have a thermostat, you don’t need to worry about overheating. I don’t have one; I use a cooking thermometer, and last season I noted that my heating cables work at a comfortable temperature for peppers and eggplants—up to 26 degrees—if the trays are not set directly on the mat. For tomatoes, I turn on the yellow circuit with a larger distance between the coils.
How to Use a Heating Mat for Seedlings
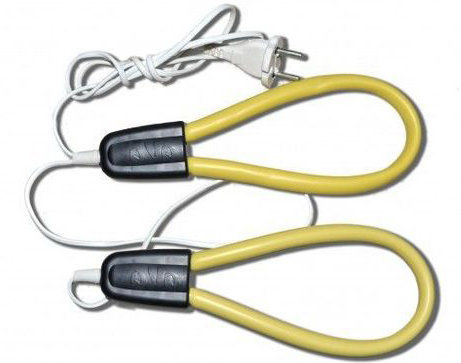
I have a small table designated for seedlings, which contains all the seedlings from the first cultivation period—peppers, tomatoes, and eggplants. As they grow and get repotted, some plants move to the windowsills, and when needed, I heat them with shoe dryers (I should note that during my first gardening season, everything grew on those dryers).
The seedlings are contained in trays or cells. I don’t place them directly on the cable— I’ve cut spacers from foam that sit on double-sided tape and place the trays on them. A frame can also be constructed from the same drywall profile.
In one of the cells of the tray, I insert the cooking thermometer and periodically check it. In my version of the heating mat, the seedlings do not overheat, so I don’t need to check frequently. At night, when the temperature should be lower, I turn off “the legs.”
When using heating and additional lighting, always be mindful of the moisture of the soil and air—it dries out much faster, especially enriched coconut peat substrates.
I stored it rolled up in the off-season, but you could sew a cover for it. I recommend making such a mat by yourself instead of buying ready-made compromise solutions. For large areas, inexpensive Turkish or domestic heated mats can be used, which have the same cable and a basic temperature switch sewn in. However, I noted the disadvantages of ready-made solutions above.
