A few days ago, I used up the last of my cress seeds and decided to research what else could be sprouted—something tasty, small, and fast-growing. After a bit of research, I want to share an idea with you: growing microgreens at home without a sprouter.
Microgreens are edible small plants grown until the first pair of true leaves appears. The use of soil and light distinguishes growing microgreens from sprouts , which are germinated in water and darkness (to elongate the stems, such as soybean sprouts) and are consumed before the true leaves appear.
 beetroot microgreens
At the microgreens stage, plants have 4 to 40 times more nutrients than mature plants. By the time the first pair of leaves forms, the sprout has consumed all the nutrients it needs from the seed. The micro and macronutrients in plant embryos are much more bioavailable compared to consuming seeds themselves (e.g., grains and legumes as porridge, dried and ground spices) but are significantly less caloric. Studies on microgreens have shown that the concentration of vitamin C in the stems before mature leaves appear is simply off the charts. You can find figures and links to scientific studies on microgreens here .
 arugula sprouts
A slight digression from the main topic, but this is too fascinating not to share: nuts, beans, and seeds (mostly grains) contain phytic acid. This topic is currently debated in medical circles; some consider it a powerful antioxidant, but it also blocks the absorption of calcium, magnesium, zinc, copper, and iron in the gastrointestinal tract. Soaking grains, nuts, and beans neutralizes phytic acid and makes them easier to digest. However, a question arises for me: do the minerals, like calcium, leach out into the water? That said, soaking does indeed help neutralize the acids, washes away molecules that inhibit enzyme activity, and enriches the nutrient profile.
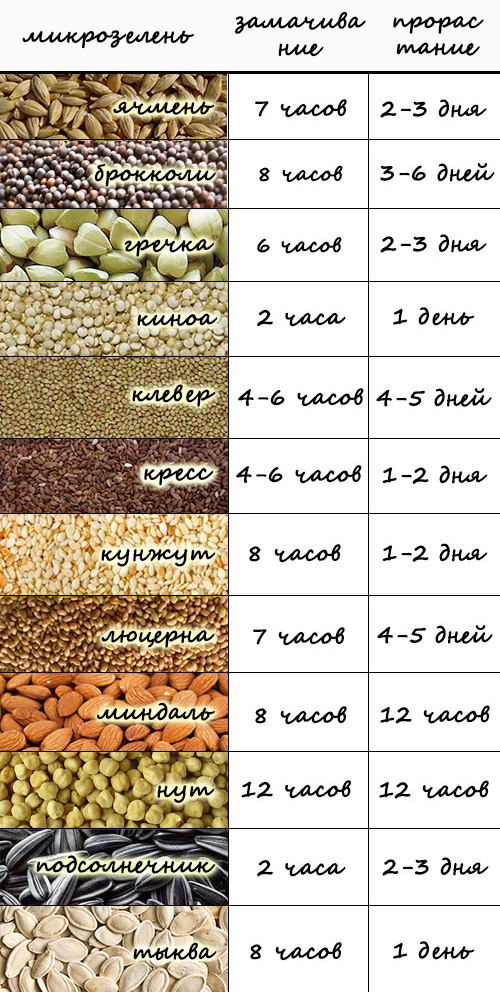
Table of Soaking and Germination for Microgreens
It’s worth noting that all microgreens are beneficial and offer great culinary enjoyment, but some seeds are especially praised:
Sunflower seeds. Their sprouts have a perfectly balanced amino acid profile, are an excellent source of plant protein, and are high in zinc, chlorophyll, antioxidants, and vitamins.
Alfalfa. A source of antioxidants and high-quality protein (greatly appreciated by vegans). Contains magnesium , iron, calcium , and phosphorus—a balanced support for the skeletal system. Also rich in vitamins A, C, E, and K.
Buckwheat. Buckwheat sprouts contain rutin, which helps strengthen blood vessels. The health benefits of regular buckwheat grains are multiplied many times over in its sprouts. Folic acid aids blood formation, and for diabetics, sprouts and grains can replace starchy foods.
") микрозелень лука (шнитт)
микрозелень лука (шнитт)
Popular Seeds for Growing Microgreens
- Broccoli
- Basil
- Cilantro
- Radish
- Clover
- Dijon mustard
- Fenugreek
- Alfalfa
- Pea
- Sunflower
- Leek onion
- Wheat
- Barley
- Oats
- Beetroot
How to Grow Microgreens?
Growing microgreens on your windowsill is very easy, fast, and the sprouts are also highly decorative.
Materials:
- Universal potting soil
- Any trays, containers, or plates
- Seeds for sprouting (you can start with a couple of tablespoons)
Without advertising organic seed stores, I’ll just mention that there are many health food stores where you can buy seeds that were previously hard to find. Prices vary but are affordable for everyone. Aside from this, I use germination as a way to utilize seeds that I no longer need for pot planting—leftovers that would spoil by the next season. Here in Poltava, I can buy seeds by weight at the market, such as alfalfa, various sunflower varieties, oats, and wheat. However, no one guarantees their organic quality. If we can even count on bio-production for seeds reaching our market. And even if the seeds aren’t perfectly “clean,” soaking and rinsing should wash away any pesticides into the water.
Why Should Seeds Be of High Quality?
Good seeds sprout, bad ones do not. And unfortunately, this is not something you can influence.
 Sunflower Microgreens
Growing Process:
For wheat, sunflower, oats, and barley: Soak the seeds in warm water for about 4-8 hours, preferably overnight. It is better to use a glass jar instead of a plastic container. Cover the container with gauze and place it in a warm, dark area, wrapping it with a dark cloth. Rinse the seeds twice a day until a small root emerges. Smaller seeds can often skip this soaking step and proceed directly to the next phases.
Fill a tray with soil to a depth of 4-5 cm, ensuring the edges are tall enough to contain the sprouts.
Spread the seeds evenly across the soil surface and press them down lightly. For smaller seeds like broccoli, radish, arugula, or cress, make sure they do not stick together, as they need some space (if growing on cotton or similar material, you can sow them densely). Larger seeds should cover the entire surface.
Spray the seeds with a mist sprayer.
Cover the container and place it in a dark, warm spot for several days (up to 5). Ventilate daily, check on the sprouts, and spray with water if necessary.
After 3-5 days, stems will appear—this means they’re ready to move to a windowsill. Sunflower seeds may need to stay in the dark a bit longer, so be patient.
The more light, the better. Rotate the trays to prevent phototropism and water carefully—spraying with a mist sprayer is preferable.
Harvest as soon as the first true leaves appear.
The soil can be sifted and reused. No need to fertilize—it contains all the nutrients required, right in the seed.
 Types of Microgreens
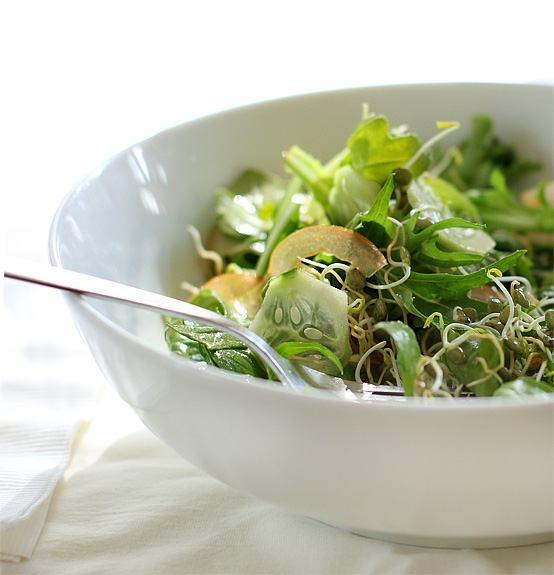
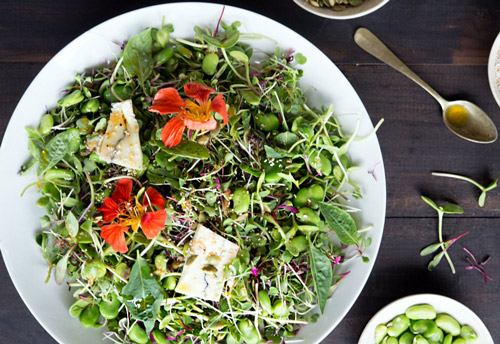
Microgreens can be enjoyed in a salad, on a sandwich, infused into vinegar, or used in an omelet or fried eggs. You can read about how to eat arugula in the dedicated article .

Early spring is the perfect time to start growing your own microgreens.