Periodic plant transplantation is essential. By avoiding this procedure for fast- and medium-growing species, we risk seriously weakening the plant’s immunity, hindering its ability to feed and breathe normally. Moreover, timely plant transplantation is much easier than cleaning up a cracked pot, dealing with an overgrown plant toppling from a windowsill, or trying to repot a plant fused to the walls of its container.
Problem #1. Overgrown Roots
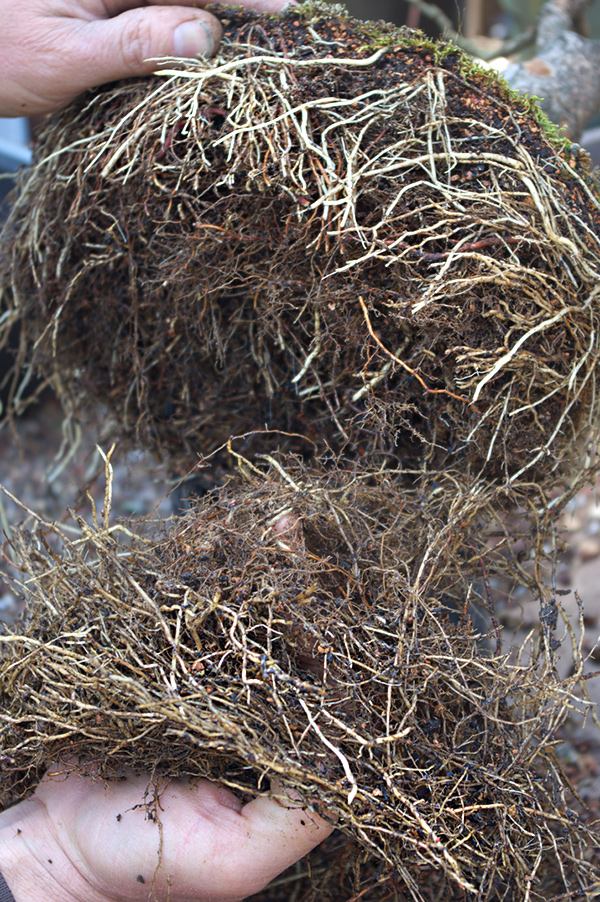
A real issue is overly grown fine roots that wrap around the pot’s perimeter like meters of tangled thread. The clump of intertwined roots turns into a hydrophobic dry sponge that repels water. Even with daily watering, the plant cannot feed properly.
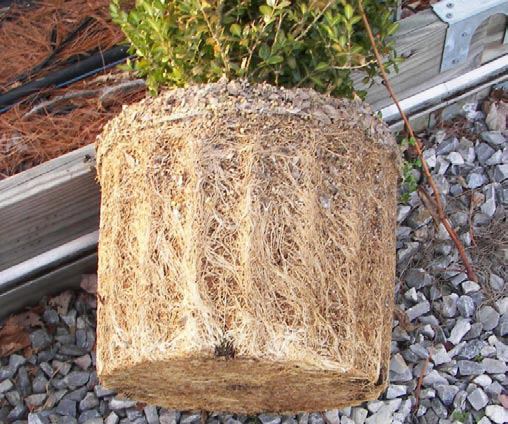
How to handle this issue?
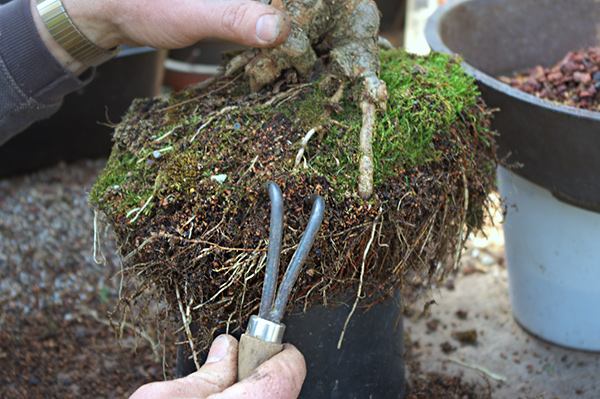
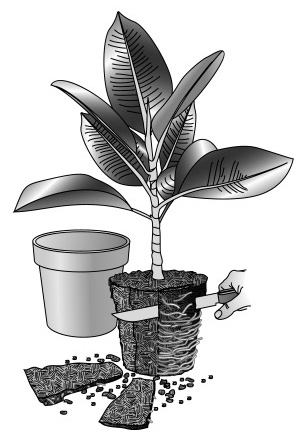
After carefully removing the plant from its pot, you need to trim part of the roots around the perimeter and at the plant’s base. You can remove up to a third of the root ball’s volume. After trimming, gently clean the roots of soil and dead root filaments. Submerge the plant in settled or rainwater at room temperature for 1–2 minutes—air bubbles will escape from the tangle, and the plant will be able to better absorb moisture and establish contact with the soil.
When is plant transplantation necessary?
- The soil dries out almost immediately and cannot retain moisture.
- Roots are visible on the surface of the potting soil or through the drainage holes.
- The pot appears “stretched.”
- The plant has outgrown its pot and is toppling over.
- The plant is growing slowly or has stopped growing entirely.
- The last transplant was over 18 months ago.
What to do before transplanting a plant?
- Water thoroughly beforehand. One or two days before transplanting, ensure the plant is well-watered. It’s easier to work with moist soil, and there’s less likelihood of damaging delicate roots.
- Prepare the pot. Choose a pot that is one size larger than the previous one. Avoid the temptation to move the plant into a much larger pot—this could lead to oversized root growth at the expense of leaves and flowers. For some plants, excess soil can even lead to root rot. If the pot has been previously used, disinfect it thoroughly. Wash new pots well with soap. For pots with large drainage holes, cover them with a piece of mesh screen.
- The debate on drainage. Studies suggest that drainage layers don’t significantly improve soil drainage and that pots with multiple drainage holes work better. Rocks only take up already limited space in pots. However, traditionally, I still use a small layer of broken brick. Materials like expanded clay, broken brick, styrofoam pieces, cork wine stoppers, broken pottery shards, pebbles, or granite chips are suitable. If you collect drainage material from outside, make sure to disinfect it first.
- Prepare the soil. Many pre-packaged soil mixes fail to absorb moisture well due to drying out during storage or questionable quality. However, you can improve packaged soil: first, sterilize it , moisten it moderately (preferably adding 2–3 drops of vitamin B1), and add perlite and vermiculite (if they’re not included in the mix). Add a bit of ash . Moistening the soil before transplanting ensures good contact with the roots.
- Favorable conditions. The room should be warm and moderately humid. Avoid planned transplantation before April; aim for sunny, warm days with a waxing Moon. Provide the plant with a place free of drafts and direct sunlight.
How to transplant?
Watch this video where a professional repots a bonsai and trims its roots before planting it in a new pot. The author explains that most roots are grown by the plant “as a reserve,” and trimming them stimulates the growth of foliage.
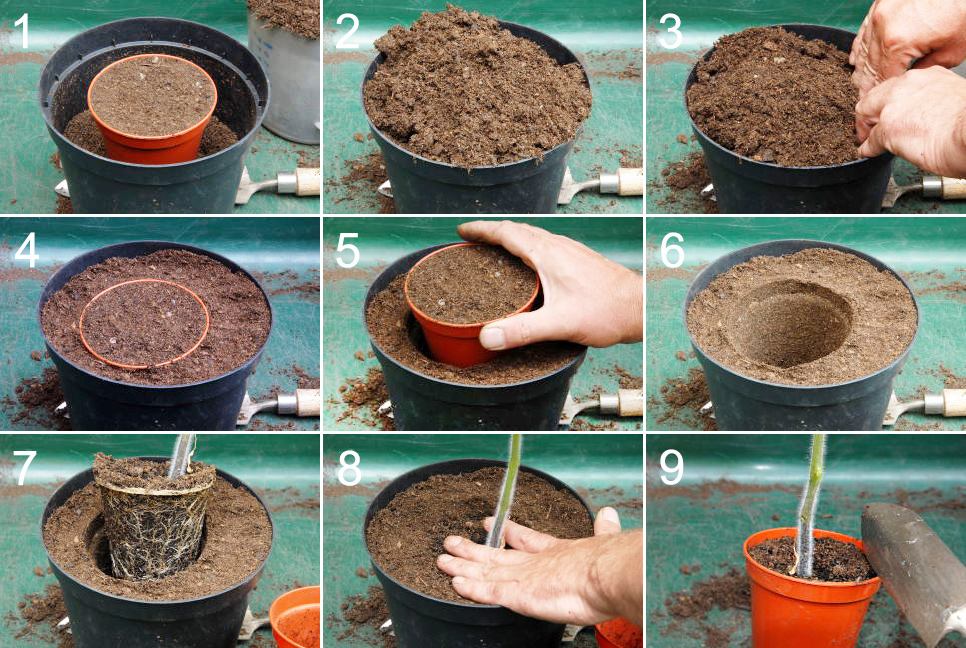
- Fill the new pot with prepared soil two-thirds full, leaving a hollow for the plant.
- Remove the plant from its old pot. Turn the pot upside down, holding the stem gently with your fingers. If the pot is flexible, lightly squeeze its sides and remove it. Removing a plant from a ceramic pot may be trickier: run a knife along the inner surface of the container, or use a spade to lift the root ball.
- Carefully examine the roots and remove dead or decayed sections.
- Loosen the root ball: “massage” it gently, allowing the old soil to fall off.
- If the roots have started to encircle the pot, trim them by up to one-third of their volume.
- Soak the roots in water for 1-2 minutes.
- Place the plant into the hole. Make sure the healthy, large roots are facing downward, and add soil, lightly compacting it. Over the next couple of weeks, the soil will settle, and you may need to add a little more.
- Moisten the soil so that water seeps through the drainage holes. Do not leave the pot on a saucer filled with water—allow all the excess moisture to drain completely. This first watering helps establish good contact between the roots and the new soil.
- Keep the plant in a shaded area for about a week. Start fertilizing after a month—during the initial period, the nutrients from the fresh soil will suffice.
These are general recommendations for beginners, but each plant species has its own transplantation rules and specifics that must be considered.
